Wild Forest Classic Dirt Pudding Cake
Wild Forest Classic Dirt Pudding Cake is a delightful and whimsical dessert perfect for celebrations, family gatherings, or just a sweet treat at home. This no-bake cake combines creamy pudding, crushed cookies, and fresh fruit to create a fun and delicious dessert that appeals to both kids and adults alike. With its playful layers and rich flavors, it’s sure to be the highlight of any occasion.
Why You’ll Love This Recipe
- Easy to Make: With simple steps and minimal cooking required, this dessert is perfect for bakers of all skill levels.
- Versatile Ingredients: You can customize the flavors with different types of pudding or toppings like your favorite fruits.
- Great Presentation: The layered look resembles a dirt mound, making it an eye-catching centerpiece for parties.
- No Baking Required: Enjoy all the fun of baking without the oven; just prepare and chill!
- Serves a Crowd: With 16 servings, it’s an ideal choice for potlucks or large family gatherings.
Tools and Preparation
To make Wild Forest Classic Dirt Pudding Cake successfully, you’ll need some basic kitchen tools. Having the right equipment on hand will streamline your preparation process.
Essential Tools and Equipment
- Mixing bowls
- Food processor
- Hand mixer or stand mixer
- Rubber spatula
- Serving dish
Importance of Each Tool
- Food Processor: Quickly crushes the Oreos into fine crumbs, saving time compared to using manual methods.
- Stand Mixer: Makes whipping cream cheese and cream effortless, ensuring a smooth consistency without much effort.
- Rubber Spatula: Perfect for folding in ingredients gently without losing air, creating a light texture in your pudding.

Ingredients
For the Cake Layers
- 14 oz package of oreos
- 3 & 1/2 cups cold whole milk
- 2 3.4 oz boxes french vanilla pudding (you can also use plain vanilla or chocolate)
- 8 oz cream cheese (softened)
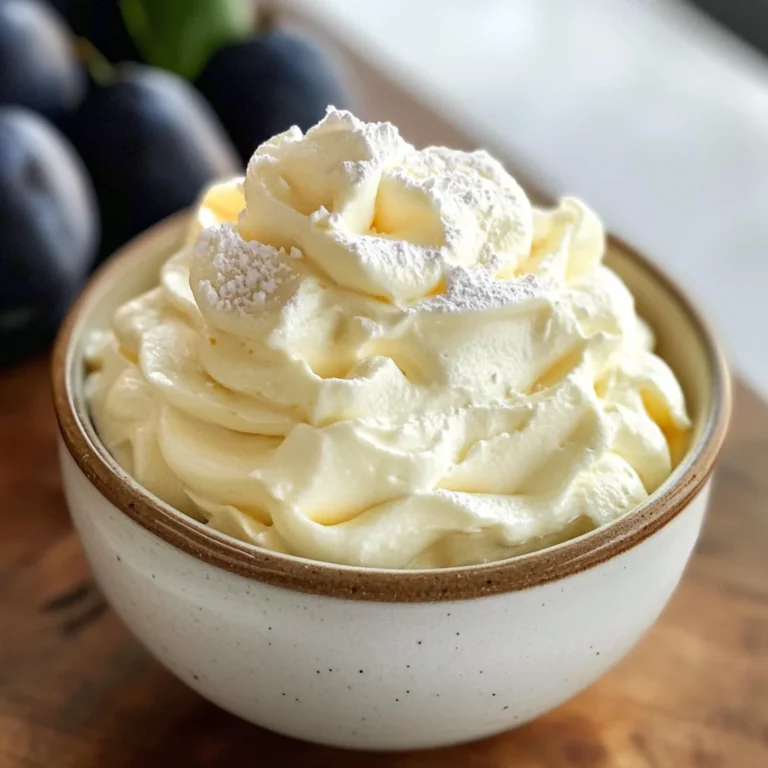
For the Whipped Cream Topping
- 1 cup heavy whipping cream (you can also replace this with cool whip)
- 3/4 cup powdered sugar
- 1 tsp vanilla extract (or vanilla bean)
For Decoration
- 1 lb fresh strawberries
- 1/4-1/2 cup fresh raspberries
- Pretzel sticks
- Mini vegan marshmallows
- 4-6oz white chocolate
- 2 tsp coconut oil (for melting)
- Crushed pistachios for moss in dirt & rocks
How to Make Wild Forest Classic Dirt Pudding Cake
Step 1: Make the Pudding & Crush Oreos
Whisk the cold milk and instant pudding mix together in a large bowl until combined. Set aside to thicken. In a food processor, add the Oreo package and pulse until they resemble coarse crumbs. Alternatively, place Oreos in a large ziplock bag and crush them with a rolling pin.
Step 2: Make the Whipped Cream
In a large bowl using either a hand mixer or stand mixer with the whisk attachment, whip the heavy cream until soft peaks form. Fold in the vanilla extract gently. Set aside.
Step 3: Whip Cream Cheese & Finish Pudding
Using your stand mixer, beat the softened cream cheese until creamy. Add powdered sugar and continue mixing until smooth. Gradually blend in the thickened pudding into the cream cheese mixture until well combined. Gently fold in the whipped cream using a rubber spatula.
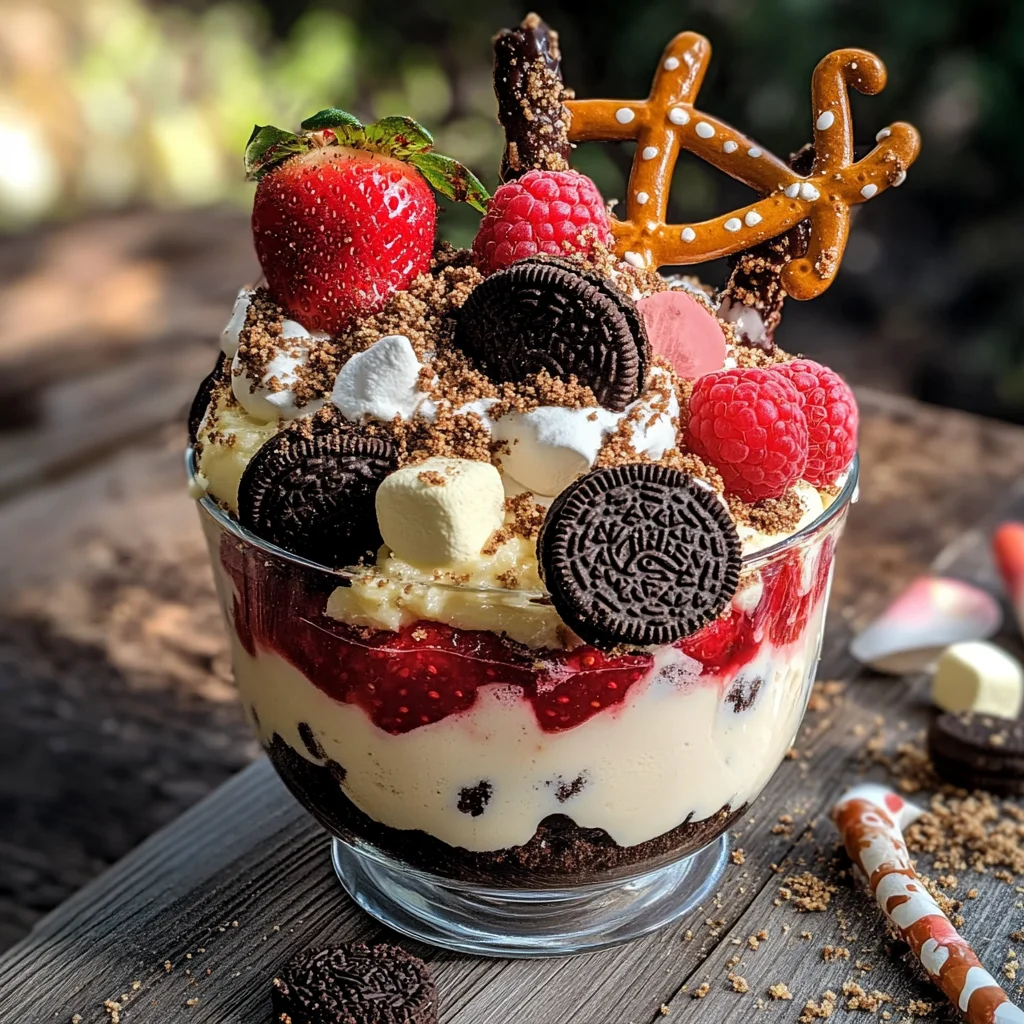
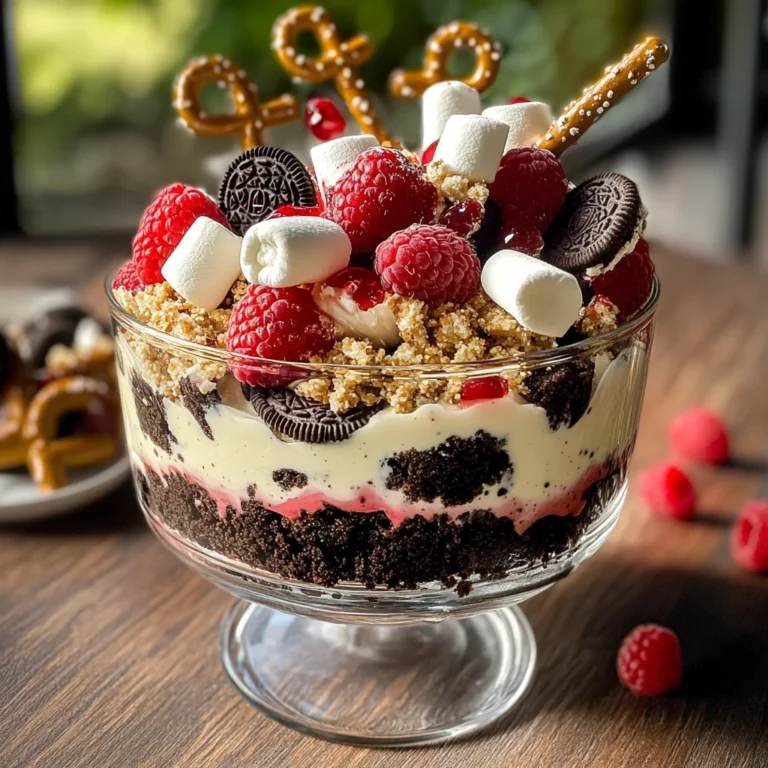
Step 4: Assemble Dirt
Choose your serving dish—an 8 or 9-inch round dish works well—or even smaller mugs if you prefer individual servings. Start by adding one layer of crushed Oreos at the bottom of your dish followed by a layer of pudding mixture. Repeat these layers until you reach the top of your dish. Finish by covering with remaining Oreo crumbs for that “dirt” effect.
Enjoy creating this delightful Wild Forest Classic Dirt Pudding Cake!
How to Serve Wild Forest Classic Dirt Pudding Cake
Wild Forest Classic Dirt Pudding Cake is a delightful dessert that can be served in various creative ways. It’s perfect for parties, family gatherings, or as a fun treat for kids. Here are some serving suggestions to enhance your dessert experience.
Individual Cups
- Serve the dirt pudding in small cups or jars. This allows guests to have their own portion, making it easy to enjoy and share.
Layered Trifle
- Use a clear trifle dish to showcase the beautiful layers of the cake. Alternate between crushed Oreos, pudding mix, and fresh fruits for an attractive presentation.
Outdoor Picnic
- Bring this dessert along for an outdoor picnic. Pack individual servings in disposable cups and enjoy the deliciousness surrounded by nature.
Birthday Party Centerpiece
- Decorate the top of the cake with additional mini marshmallows, fruit, and pretzel sticks to create a fun centerpiece for a birthday party.
Themed Dessert Table
- Incorporate this pudding cake into a nature-themed dessert table. Surround it with items like edible flowers, chocolate rocks, and greenery to enhance the theme.
Fun with Kids
- Let children help assemble their own dirt pudding cups using different toppings like mini marshmallows and fruit. It makes for a fun activity while enjoying dessert!
How to Perfect Wild Forest Classic Dirt Pudding Cake
To make your Wild Forest Classic Dirt Pudding Cake even more delicious and visually appealing, consider these tips.
-
Use Fresh Ingredients: Always opt for fresh strawberries and raspberries. They not only taste better but also add vibrant colors to your dessert.
-
Chill Before Serving: Allow the assembled cake to chill in the refrigerator for at least 2 hours before serving. This helps the flavors meld together beautifully.
-
Texture Variation: For added texture, consider mixing in some crushed nuts or granola between layers along with the Oreos.
-
Creative Toppings: Experiment with different toppings like coconut flakes or edible flowers for a beautiful finish that enhances the natural theme.
Best Side Dishes for Wild Forest Classic Dirt Pudding Cake
Pairing side dishes with Wild Forest Classic Dirt Pudding Cake can elevate your meal experience. Here are some great options:
-
Fruit Salad
A refreshing mix of seasonal fruits adds brightness and balances the richness of the cake. -
Cheese Platter
A selection of cheeses provides savory contrasts to the sweet dessert, creating a well-rounded snack table. -
Mini Veggie Cups
Fresh vegetables served in individual cups with hummus or ranch dip offer a crunchy counterpart to creamy pudding. -
Chocolate-Covered Pretzels
These sweet-and-salty snacks are perfect finger foods that complement the flavors of dirt pudding cake. -
Muffins
Light vanilla or berry muffins can serve as a lovely addition, adding variety without overshadowing the main dessert. -
Ice Cream Floats
Serve ice cream floats made with soda and vanilla ice cream as a refreshing drink that pairs nicely with sweet treats. -
Trail Mix
A wholesome trail mix filled with nuts, seeds, and dried fruit can provide an easy snack option that ties into the nature theme. -
Whipped Cream Dips
Different flavored whipped creams serve as dips for fruits and cookies while enhancing dessert enjoyment alongside dirt pudding cake.
Common Mistakes to Avoid
When making Wild Forest Classic Dirt Pudding Cake, it’s easy to make a few common errors. Here are some mistakes to watch out for:
-
Not letting the pudding thicken properly: Allowing the pudding to set is crucial for a creamy texture. Be patient and wait until it reaches the right consistency before mixing it with other ingredients.
-
Overmixing the cream cheese: When beating the cream cheese, avoid overmixing as it can become too runny. Mix just until creamy and smooth for the best results.
-
Skipping the folding technique: Incorporating whipped cream into the mixture should be done gently. Skipping this step can result in a dense texture instead of a light and airy dessert.
-
Using stale Oreos: Freshness matters! Ensure your Oreos are fresh for optimal flavor and texture in your dirt pudding cake. Stale cookies won’t provide that delightful crunch.
-
Ignoring presentation: This dessert is visually appealing. Don’t forget to decorate with fresh fruits, crushed pistachios, or pretzel sticks on top for a stunning finish.
Storage & Reheating Instructions
Refrigerator Storage
- Store Wild Forest Classic Dirt Pudding Cake in an airtight container.
- It will last up to 3-4 days in the refrigerator.
Freezing Wild Forest Classic Dirt Pudding Cake
- You can freeze individual portions wrapped tightly in plastic wrap.
- It’s best consumed within 1-2 months after freezing for optimal taste and texture.
Reheating Wild Forest Classic Dirt Pudding Cake
- Oven: Preheat oven to 350°F (175°C) and warm individual servings covered with foil for about 10-15 minutes.
- Microwave: Use medium power, heating in short bursts (20-30 seconds) until warmed through.
- Stovetop: Place on low heat in a non-stick pan, stirring gently until warmed through, being careful not to overheat.
Frequently Asked Questions
Here are some common questions about making Wild Forest Classic Dirt Pudding Cake that might help you while preparing your dessert:
What can I use instead of heavy whipping cream?
You can replace heavy whipping cream with Cool Whip or any plant-based whipped topping for a lighter version without losing creaminess.
Can I use different flavors of pudding?
Absolutely! While French vanilla is recommended, you can use plain vanilla or chocolate pudding mix to customize your flavor profile.
How long does Wild Forest Classic Dirt Pudding Cake last?
When stored properly in the refrigerator, this dessert lasts about 3-4 days. For longer storage, consider freezing it.
Is there an alternative to Oreos?
Yes! You can use gluten-free cookies or any chocolate sandwich cookies if you prefer a different brand or have dietary restrictions.
Can I add more fruits to my cake?
Certainly! Feel free to include other berries like blueberries or blackberries. They add great color and flavor!
Final Thoughts
The Wild Forest Classic Dirt Pudding Cake is a delightful treat that combines rich flavors with fun textures. Its versatility allows you to customize it with various toppings and flavors based on your preferences. Whether for a gathering or just a sweet snack at home, this dessert is sure to impress everyone who tries it! Give it a go and enjoy making this delicious cake!
Wild Forest Classic Dirt Pudding Cake
Indulge in the delightful Wild Forest Classic Dirt Pudding Cake, a whimsical dessert that is perfect for celebrations, family gatherings, or simply as a sweet treat at home. This no-bake cake brings together creamy pudding, crushed cookies, and fresh fruit to create a fun and delicious dessert that appeals to both kids and adults alike. With its playful layers resembling a dirt mound and rich flavors, this dessert is sure to be the star of any occasion. Easy to make and customizable with your favorite flavors, the Wild Forest Classic Dirt Pudding Cake is an eye-catching centerpiece that will impress your guests.
- Total Time: 0 hours
- Yield: Serves 16 1x
Ingredients
- 14 oz package of chocolate sandwich cookies
- 3 & 1/2 cups cold whole milk
- 2 3.4 oz boxes vanilla pudding mix
- 8 oz cream cheese (softened)
- 1 cup heavy whipping cream
- 3/4 cup powdered sugar
- Fresh strawberries for decoration
- Fresh raspberries for decoration
- Pretzel sticks
- Mini vegan marshmallows
- 4–6 oz white chocolate
- 2 tsp coconut oil (for melting)
- Crushed pistachios for decoration
Instructions
- In a large bowl, whisk together the cold milk and pudding mix until combined. Set aside to thicken.
- Crush the chocolate sandwich cookies in a food processor or ziplock bag until they resemble coarse crumbs.
- Whip the heavy cream in a separate bowl until soft peaks form. Gently fold in vanilla extract.
- Beat the softened cream cheese until creamy, then mix in powdered sugar. Gradually blend in the thickened pudding until smooth.
- Fold in the whipped cream gently using a spatula.
- In your serving dish, layer the crushed cookies and pudding mixture alternately until filled. Top with remaining cookie crumbs for decoration.
- Prep Time: 30 minutes
- Cook Time: None
- Category: Dessert
- Method: No-Bake
- Cuisine: American
Nutrition
- Serving Size: 1 piece (approximately 110g)
- Calories: 320
- Sugar: 24g
- Sodium: 210mg
- Fat: 19g
- Saturated Fat: 10g
- Unsaturated Fat: 8g
- Trans Fat: 0g
- Carbohydrates: 34g
- Fiber: 2g
- Protein: 5g
- Cholesterol: 40mg